Your ad blocker is preventing some content from displaying properly. Please disable it to fully enjoy the site.
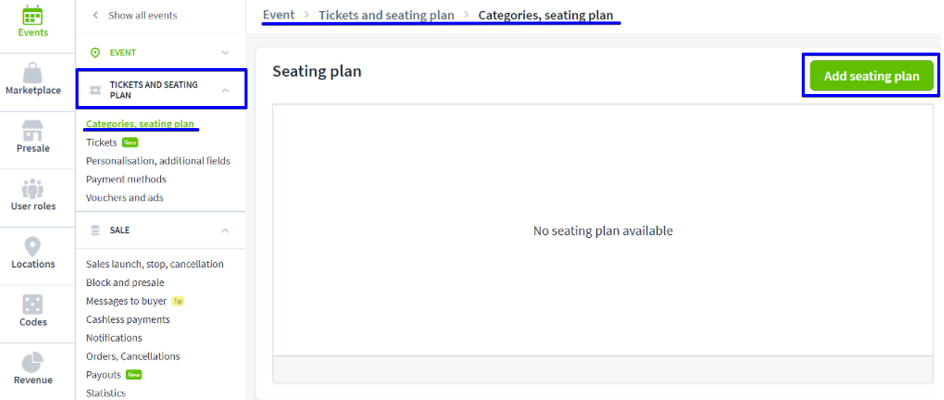
Log in with your Eventfrog account and edit the desired event. Under "Tickets & seating plan" in the "Categories, seating plan" section, you can click on the "Add seating plan" button. The seating plan manager will open, which you can use to map your seating plan.
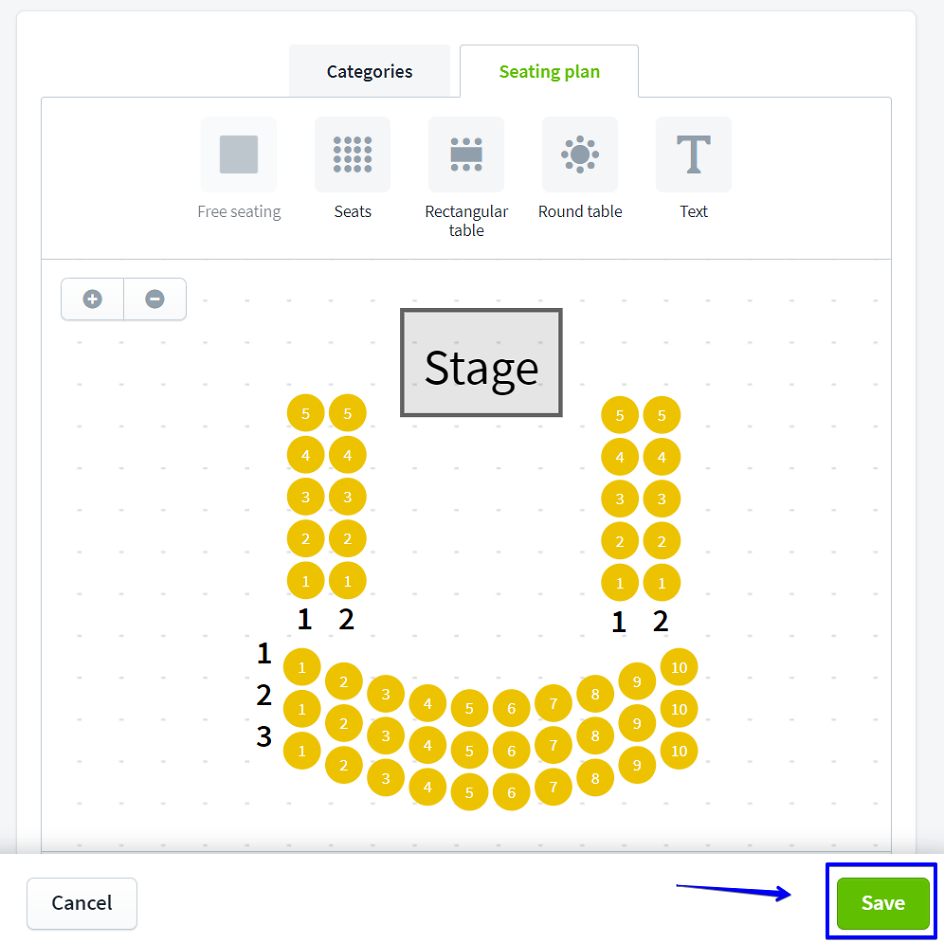
In the seating plan, you can select various elements such as standing room, seating, tables, etc. and integrate them into your seating plan. You can categorise, move, rotate and name the individual elements. You can determine how many seats an element has and how they are arranged. You can also number seats using various options.
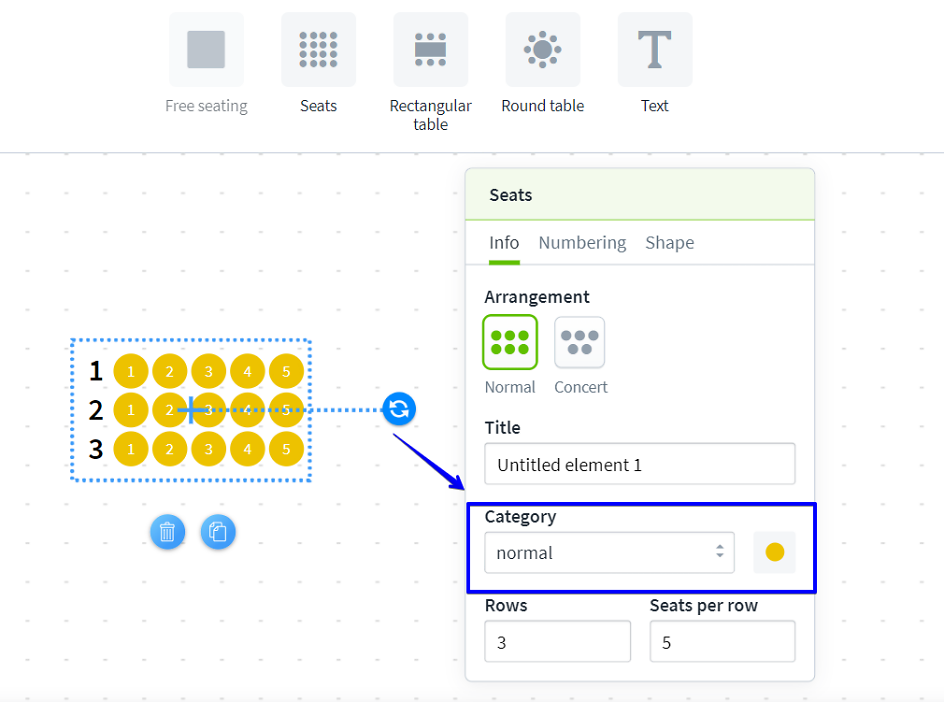
Click on the corresponding element and a settings window will open. Now click on "Category" in this window and a selection with your previously created categories will appear. Select the appropriate category.
For special elements, such as a stage, a bar, an emergency exit, etc., you can select the text element, name it accordingly and place it.
Click on the relevant element. A blue button with a rubbish bin icon will now appear under the element. If you click on this, you can confirm the process with "Yes, delete".
No changes can be made to the seating plan after publication. An overview of all possible adjustments before / after publication can be found here >
Under "Tickets & seating plan" in the "Categories, seating plan" section, you can click on the "Add seating plan" button. The seating plan manager will open, which you can use to map your seating plan.
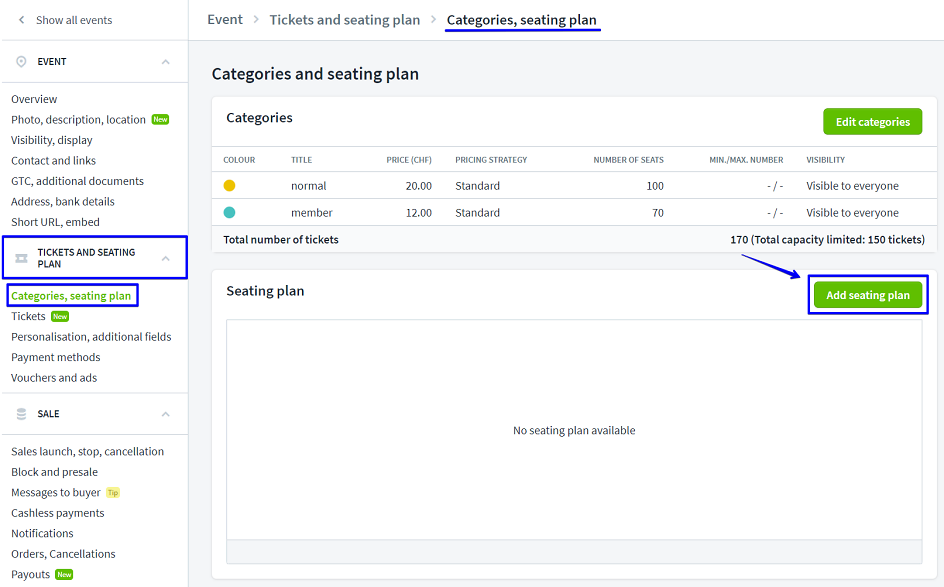
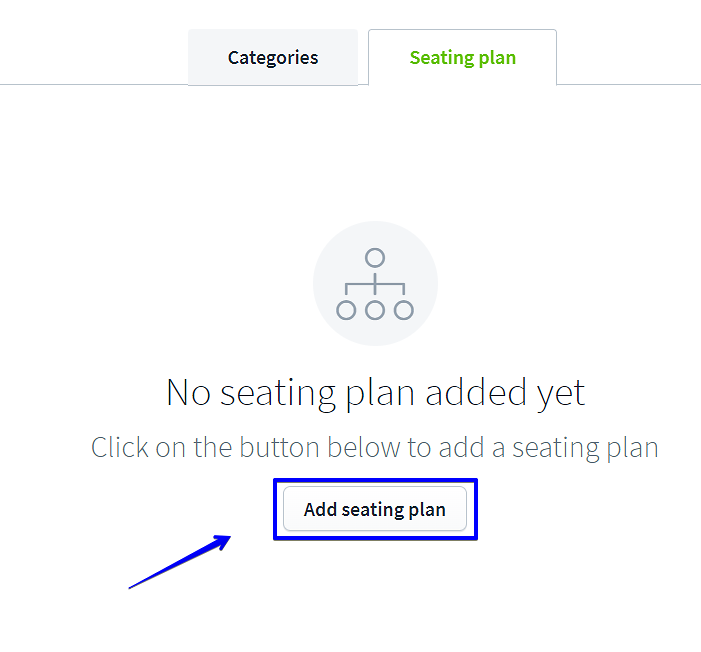
Now click on the "Add seating plan" button to create the desired seating plan.
In the seating plan, you can select various elements such as standing room, seating, tables, etc. and integrate them into your seating plan. You can categorise, move, rotate and name the individual elements.
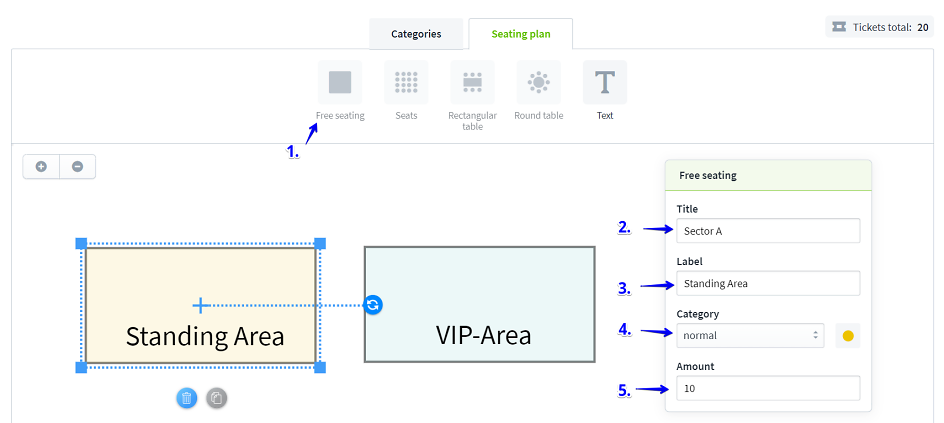
You can use the "Free choice of seats" element to create different standing room areas for a concert, for example. You can use this feature as follows:
1. click on the "Free place selection" element and drag it into the editing field. When you click on the element in the editing field, a settings window opens. You can make various settings there.
2. now determine the title of the element, for example "Sector B"
3. add a label such as "VIP". This label will be visible to ticket buyers in the seating plan.
4. now select the corresponding category that has already been entered, such as the category "VIP area".
5. determine the number of tickets.
You can make and adjust these settings for all elements. If you copy an element using the "Copy" button, the settings are also copied.
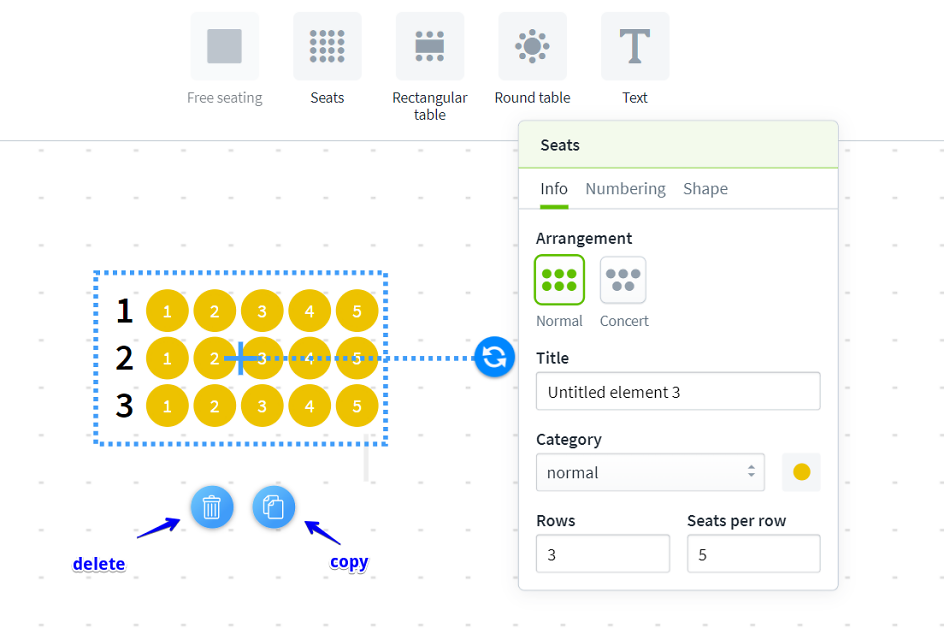
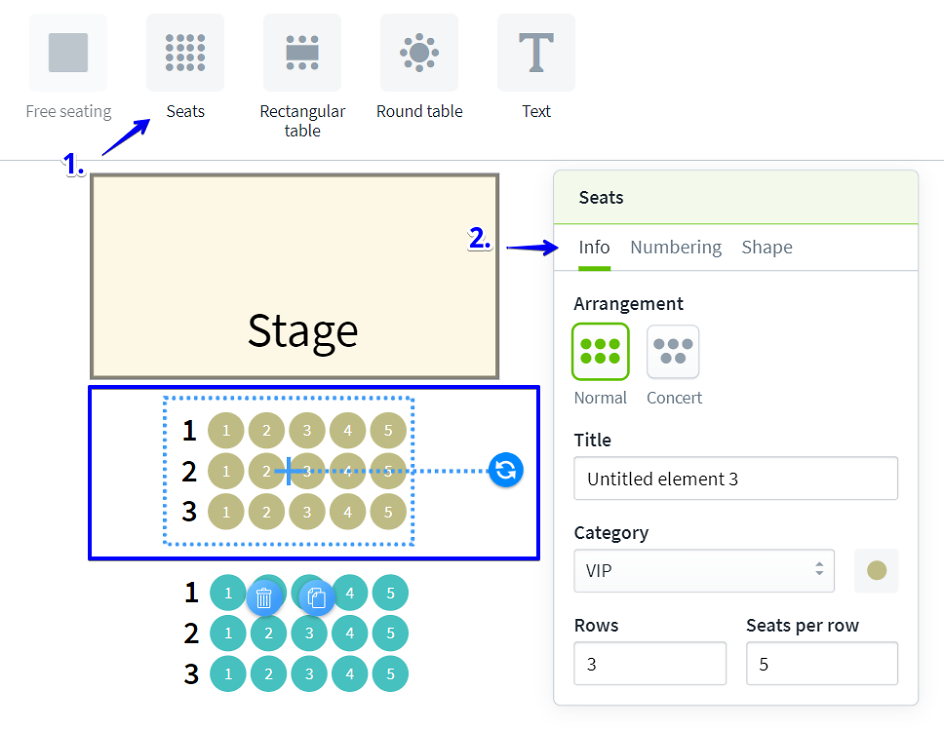
You can use the "Seating" element to create different seating areas for an event. You can use this feature as follows:
1. click on the "Seats" element and drag it into the editing field. When you click on the element in the editing field, a settings window opens. You can make various settings there.
2. in the "Info" tab, you can select a seat orientation, determine the title, select the associated category and define the number of rows and number of seats per row.
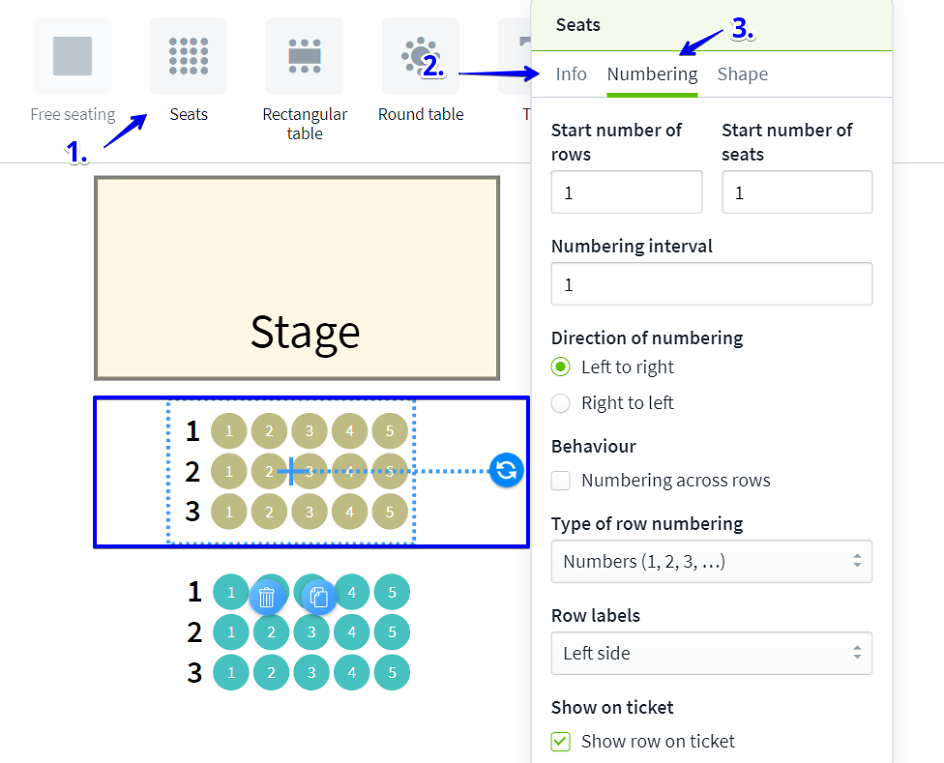
3. you can make the following settings in the "Numbering" tab:
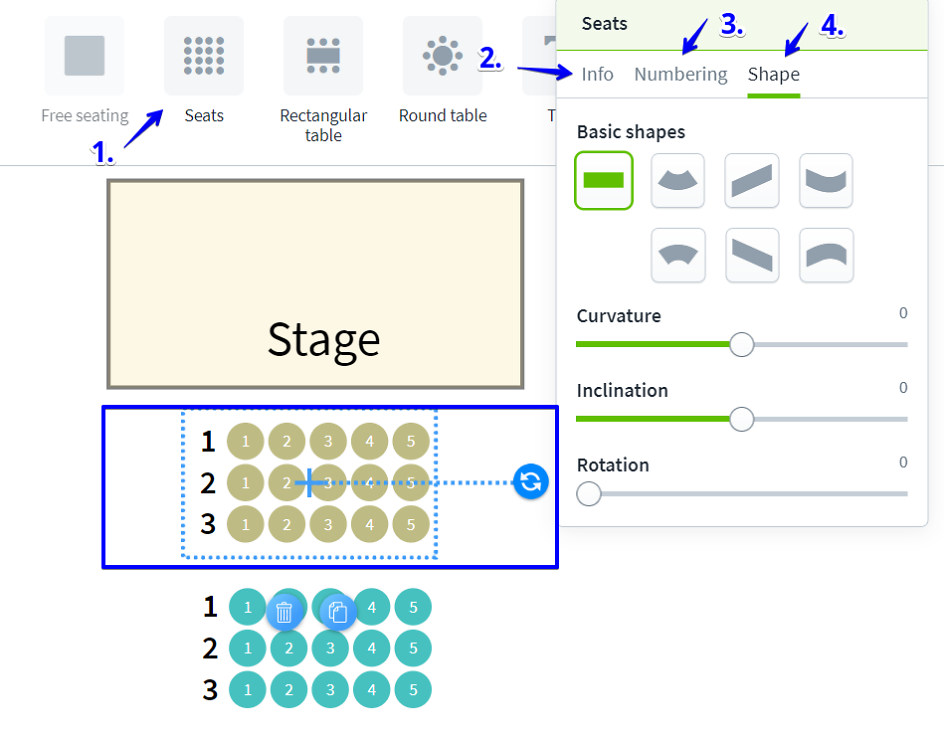
4. in the "Shape" tab, you can shape the seats as you wish. You can make the following settings:
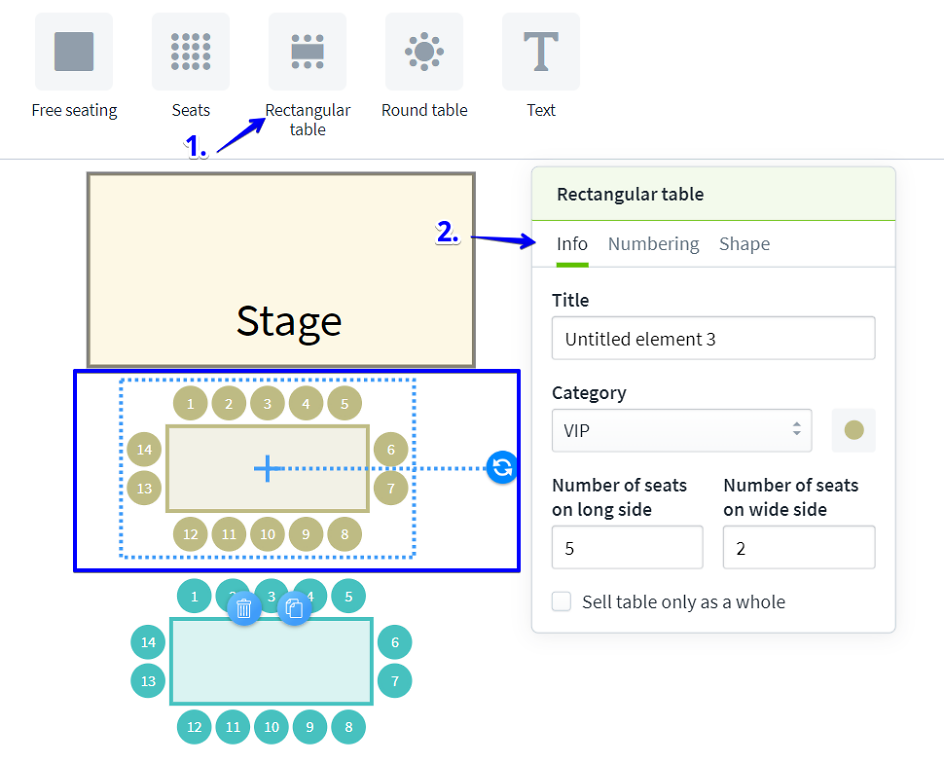
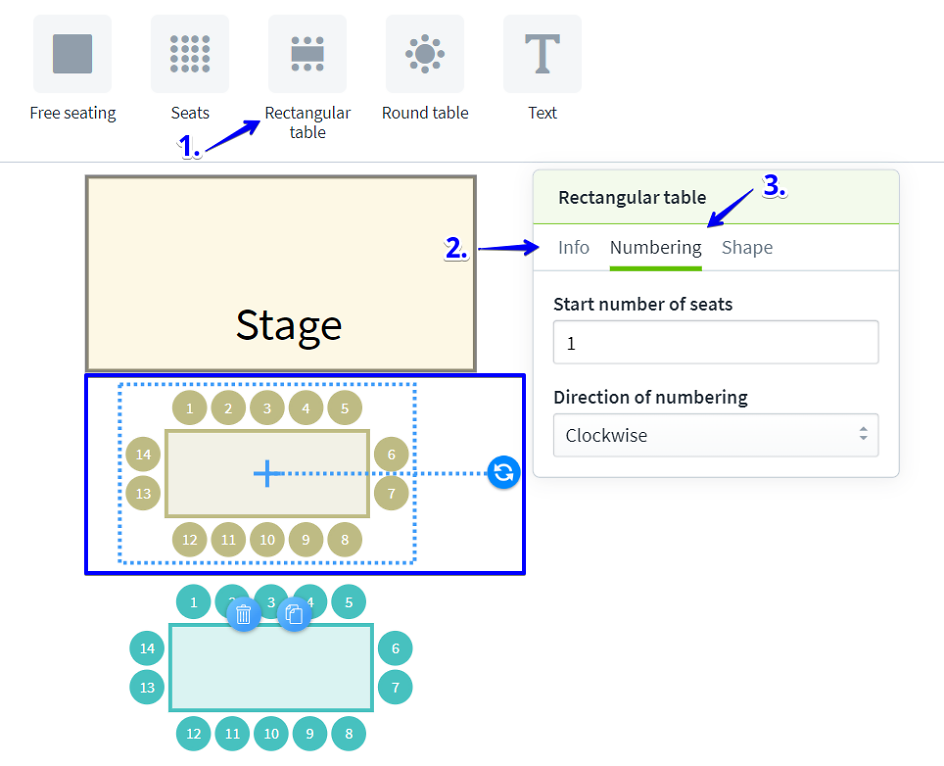
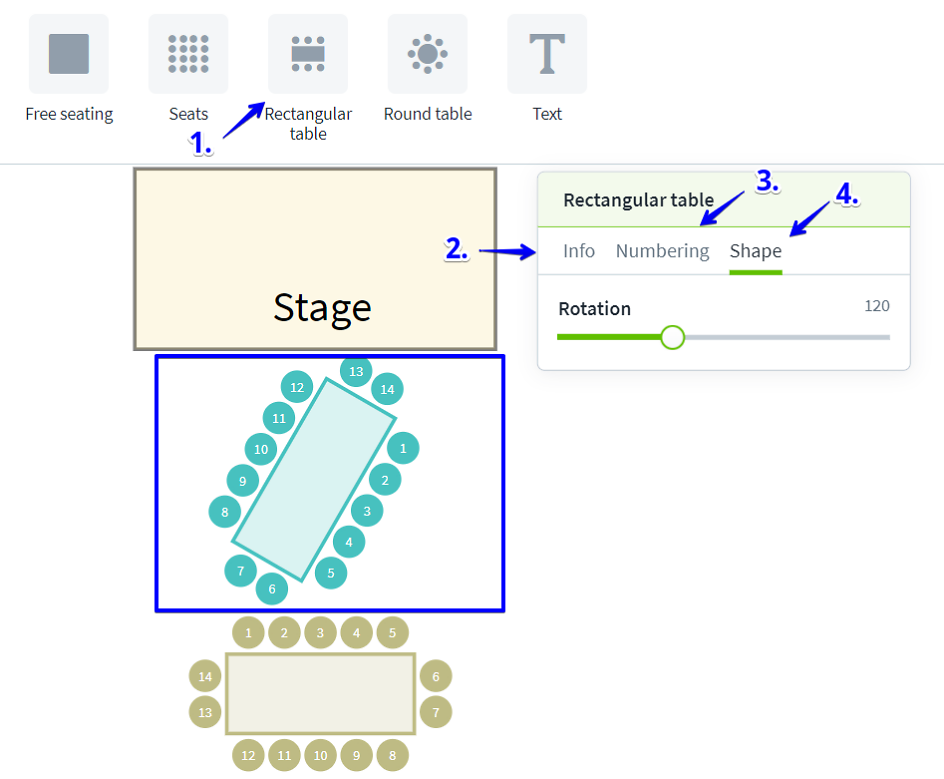
You can use the "Square table" or "Round table" element to create different table areas for an event. You can use this feature as follows:
1. click on the "Square table" or "Round table" element and drag it into the editing field. When you click on the element in the editing field, a settings window opens. You can make various settings there.
2. in the "Info" tab, you can specify the title and the associated category for the element. You have the option of defining the number of seats in length and width. You can also decide whether you want to sell individual seats or just the table as a whole.
3. in the "Numbering" tab, you can define the starting number of seats and the numbering direction.
4. in the "Shape" tab, you can shape the rotation of the element.
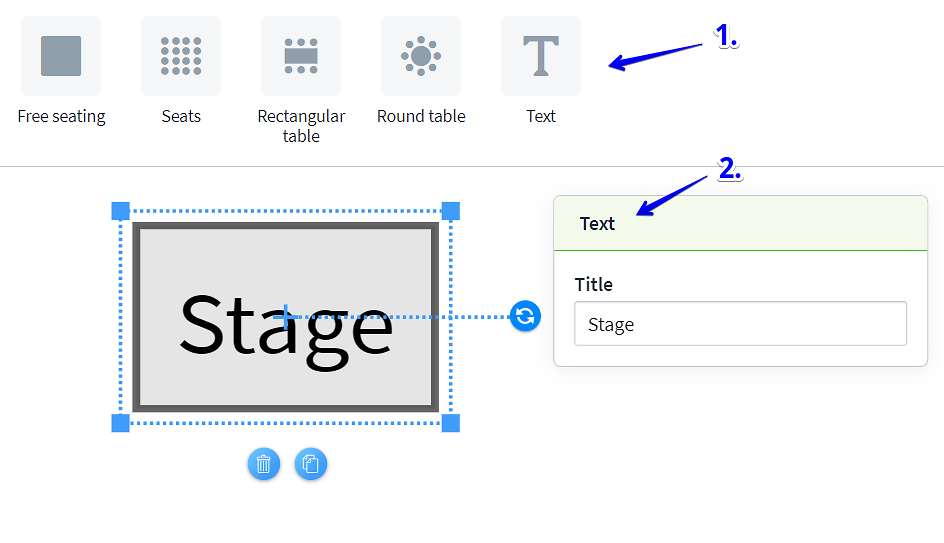
You can use the "Text" element to create text elements for the seating plan, such as "the stage". You can use this feature as follows:
1. click on the "Text" element and drag it into the editing field. When you click on the element in the editing field, a settings window opens. You can make various settings there.
2. in the "Text" tab, you can define the title of the element.